
MadCap Flare Trial and Tutorial Review
The Flare Tutorial is an 88-page PDF file with step-by-step instructions on using MadCap Flare. Creating a project called “San Diego”, using a pre-existing template, is fairly easy. That is covered in the first 19 pages. Once you have created a project, and a topic (or snippet or master page) it will be seen within the XML Editor. All writing, formatting, and editing are done in the XML editor.
The Basics
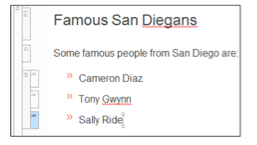
Building content and adding bullets to a list is the same as in Word. You highlight the list, and in the Home tab select the bullets you want. I selected small dots, but as you can see in the following picture, they show up as arrows (>>) within the editor.
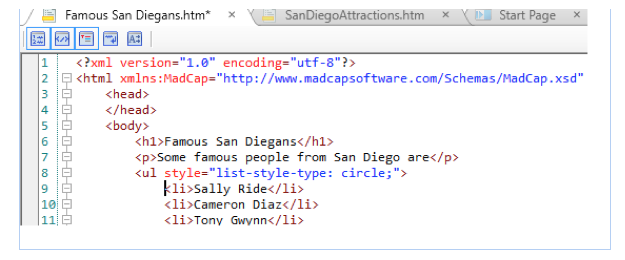
The tags to the left of the page are side structure bars that show each element’s XML tag. <h1> tag is for heading 1, <p> tag is paragraph text, <ul> tag is for unordered list, and <li> for list items. The list elements can be grabbed, dragged, and dropped to change the order. If you want to work in XML, click the Text Editor tab at the bottom, and the page comes up in XML format.
This is a nice feature for a technical writer familiar with markup languages.
Inserting an image is less intuitive. You must first place your cursor at the end of the paragraph that is talking about Mexican food, and press enter to make space for inserting an image. Then open the resources file on the left, and the Images file. Then open the Insert tab on top, and when the window opens select the icon with the papers on it to open the images files already in the system. This minor detail was left out. When you select tacos, it will insert the picture.
For the tutorial you are opening the existing list, by clicking on the icon of papers. The method described also has access to your own computer files, under a different icon. The easier method for inserting the image of the tacos, is drag and drop.
The tutorial next tells how to make cross references, which also can be created using drag and drop. The benefit of using a cross-reference versus a hyperlink is that they use format commands to automatically update the link. You can also have the cross reference give the page number, title of the topic, or even a file path.
This blog is not going to go into detail on building a cross reference where you have the ability to change the style. The easiest method is to drag and drop, maintaining the Flare format. You simply type in SEE, and drag an .htm document, in this case Food.htm, then type AND and drag the Beer.htm file. That is a really nice feature. You do want the bracket that shows to look
like this: BEER [
not like this BEER ]
If is not facing right, hit the right arrow key twice. This sets the link.
*Now The Features Are Getting Interesting
If you have ever had a topic that was so long that you wanted to break it into easier to digest pieces, the next feature is for you.
Drop-Down Text
Inserting drop-down text is simple using Flare. In the folders you select the topic SanDiegoAttractions, which opens in the XML editor. At the end of the first paragraph you add a space, then use your mouse to highlight the text you added, the paragraph about the park, and the image of the fountain. Select Insert tab. In the Text section select Drop-Down Text. The text now has a drop-down, and has a special style applied to it, called MadCap: dropDown
Snippets
Making Snippets allows you to reuse text in content without having to recopy it. It can be any size of text, images, lists, or even other types of Snippets. To create a Snippet, go into the content Explorer, double-click Home.htm. The topic opens in the XML Editor. Highlight the information you wish to copy. Select the Home tab. Create Snippet opens. Type the name of the Snippet “SanDiegoIntro”. As long as Replace Source Content with the New Snippet is selected, the text will be inserted into the topic. Then hit Create.
Click on where you want to copy the Snippet, and add a space. In Insert and Single Source Select Snippet, and go to Content>Resources>Snippets>SanDiegoIntro.flsnp, hit OK and you are set. After going through all of that, you are told that you can also drag and drop.
Insert a Table
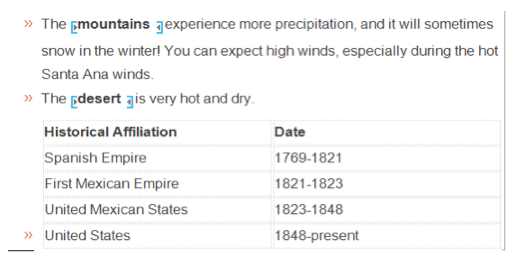
Inserting a Table follows a similar routine to that of a Word document. After inserting a Table, you can Choose the table style. Basic Alternate Rows will show alternating rows of two shades of blue. Otherwise the table will look like the example below. Content can be typed directly into the Table.
Creating a Style Class
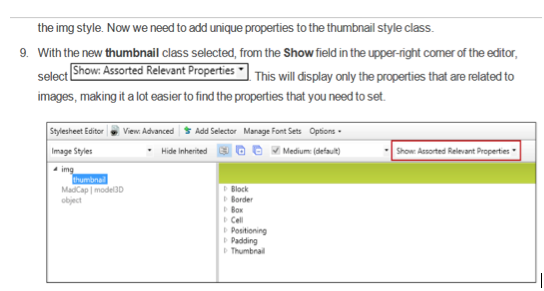
This is where the content is made pretty by adding thumbnail pictures. Everything was going along fine with the process on changing an image to a smaller thumbnail version, until reaching the directions shown below. That is because the Show Assorted Relevant Properties that is shown below, does not exist in Flare Version 12. However, it still remains that the easiest method is to simply resize the image you select, then again Drag and Drop!
Using Conditions
Allows the selection of Screen Only or Print Only, and determines how the content will appear. The directions are easy to follow for this task.
Working with Skins
The tutorial shows how to insert a logo into the Skin (page) for the Web medium. The other two mediums are Tablet and Mobile.
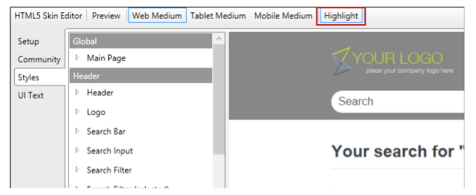
Clicking on Highlight synchronizes the styles on the left. Click on Logo to open access to a window with Image: Here is where you see the location of the image. The steps to locate the image are Open File.
Next navigate to \Documents\MyProjects\SanDiego\Content\Resources\Images and select SanDiegoLogoTransparent.png. Open. OK.
Using a Table of Contents
The set of instructions tells how to drag and drop each section into the main topic, building an index. Nothing difficult or unusual here.
Building Output
Tells how to build PDF and HTML5 output. The tutorial actually created a PDF target file, but to creating an HTML5 target would be as directed in the section”Creating a New Target” as seen earlier.
Templates are availble that aid in the creation of various documents:
Project templates include:
- Knowledge Base
- Online (Basic / Advanced)
- Print & Online (Basic / Advanced)
- Brochures (3fold, 4fold)
- Book & eBook (Basic / Advanced)
- Policies & Procedures (Basic / Advanced)
- Product Foldout (3fold, 4fold, 5fold, 6fold, 12fold)
- User Guide (Basic / Advanced)
- Slideshow
Although this tutorial is extensive, addition information is contained in HELP. MadCap also offers web-based certification classes that are available through MadSkills. For course information contact MadCap. The sales specialist are very attentive, and contacted us via email during the free trial to ask if we had any questions, or needed any assistance.
Phone +1 (858) 320-0387 OR Contact Sales
Additional modules that assist technical writers can be purchased are:
- MadCap Lingo – A translation and workflow management tool that will work with Flare or as a standalone.
- MadCap Contributor – Permits streamlined workflow for Content Development.
- MadCap Analyzer – Finds and reports critical issues, such as missing content or broken links, and non-critical technical issues such as unused style sheets or images that can be removed.
MadCap Flare has a 30 day free trial for the main software as well as these additional three modules. It could be a challenge to assess all of these products in that period of time. The price of the software is not inexpensive, but may be worth looking into if your technical writers need a sophisticated tool for assistance in creating, formatting, and organizing their documents and online content.
Here are some things worthy of noting about the trial versions.
Note: The trial version of MadCap Contributor includes a non-expiring, free review with annotation mode, allowing for perpetual review between SME, managers and Flare authors. To take advantage of Contributor’s full editing capabilities, a license is required.
Note: While in trial mode, Analyzer only returns the first 10 results in a report. Analyzer runs in trial mode. The trial is limited to a 30-day evaluation period and cannot be used for production work.
Note: While in trial mode, MadCap Lingo will scramble the content when projects are exported to any of the supported file formats. MadCap Lingo runs in trial mode. The trial is limited to a 30-day evaluation period and cannot be used for production work. Upon purchase and activation of MadCap Lingo, the limitations are removed and the projects created during the evaluation period may be used for production.
About the Author Jean Fischer is an MSD communication consultant specializing in technical writing for emerging technologies, information technology, marketing, and intelligence. Connect with Jean today!